

Explorations on Doll Movement, Part 3
Continuing the small unplanned series of posts where I give to my exploring nature and try a few different things to add more movement to the wool sculpted dolls I create.

Explorations on Movement: creating inner joints with needle felting.
As you can see, the quest for bendy knees without the need for a hand-made seam across the knee, has been keeping me awake at night. Not really, but it does come into my dreams very often.
I have a series of experiments on movement written down in my doll journal, that I sure hope I can tackle with fervour this year. This one was the first one because in all honesty, it was the easiest to my mind to achieve.
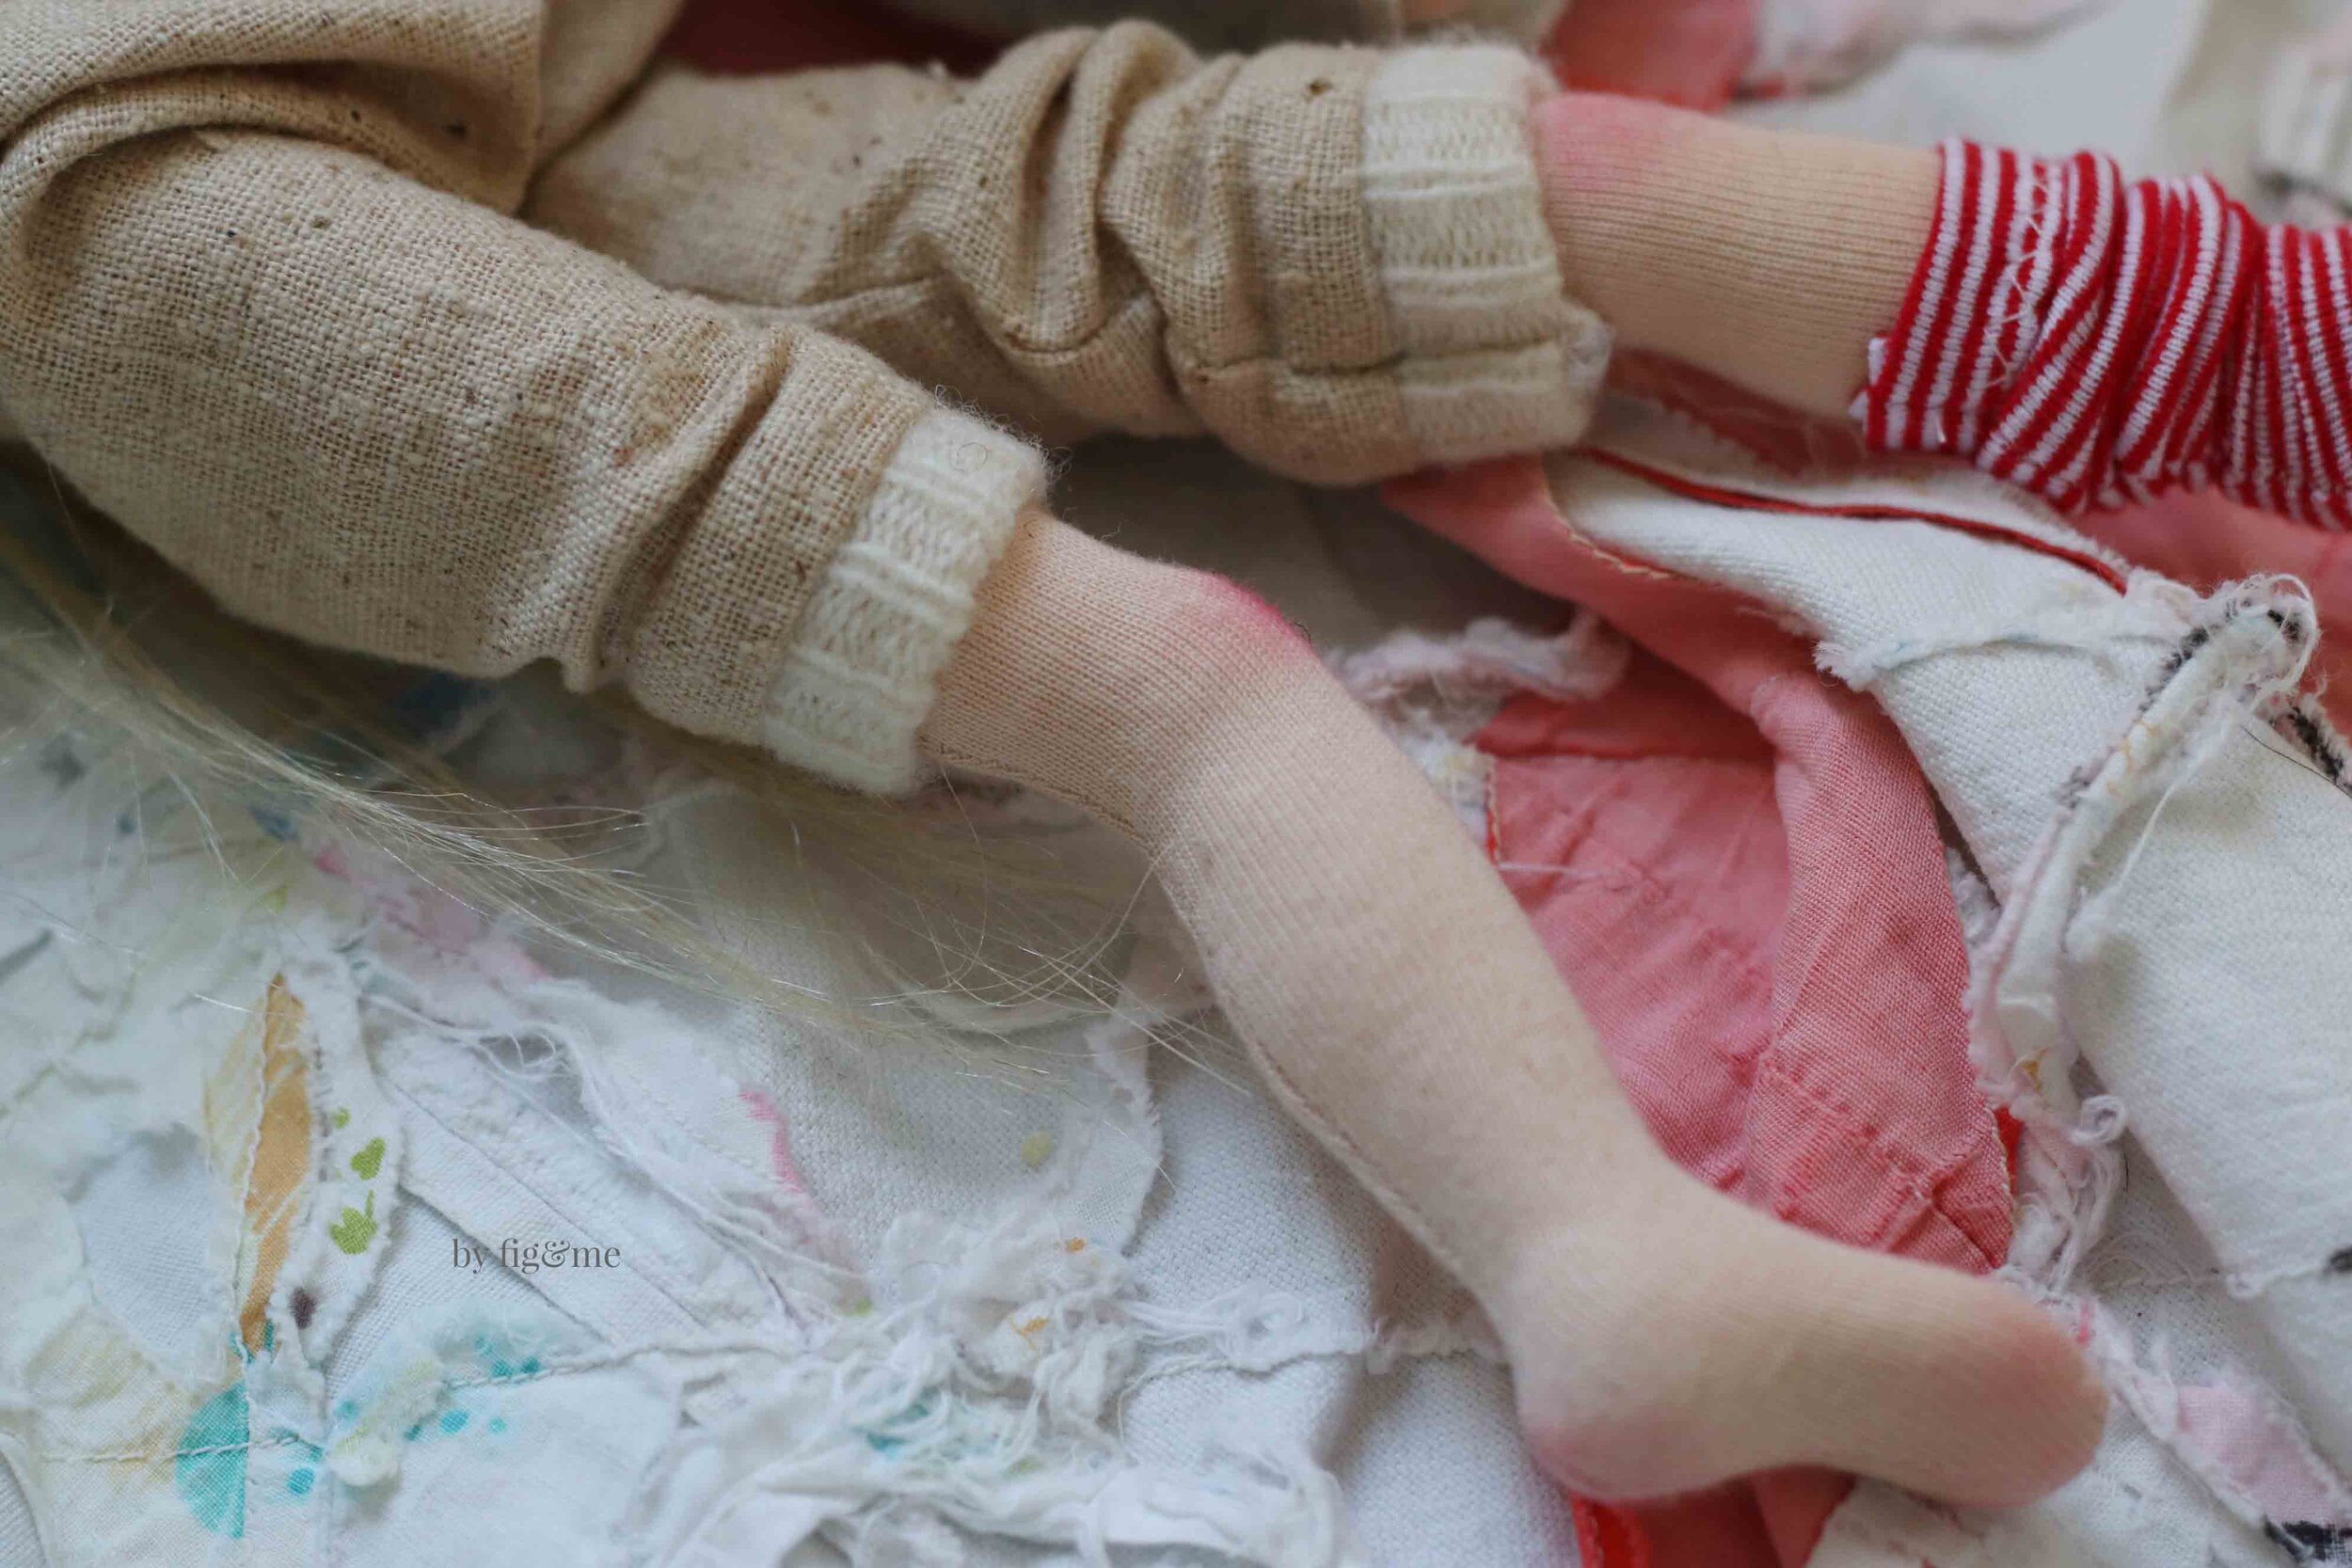
Now, before you ask, no there is no wire in this leg. There is no seam as you can see to keep the leg into the bend position. There is no other armature inside either. The doll can’t keep the knee bent forever and ever.

Explorations on Doll movement: achieving bends with the help of needle felting.
In my previous knee experiments I created a semi-bendy leg by stuffing the doll leg this way: stuff the feet first, then roll (with the help of the wool wand) ultra hard calves, then make a very hard and compacted ball for the knee, then ultra hard rolls for the thighs.
Because the doll pattern I used (the Petite Fig) has an actual curve to allow for knees, I think this experiment went rather well and the dolls can keep the leg at a somewhat bend if you manipulate the wool parts into that position.
The thing that I was after at the time was for the dolls to be able to stand as well. Usually when you create a bend at the knee, your doll won’t be able to stand on its own anymore, and I wanted to see if that was a possibility. For that experiment, we achieved success.
However…you cannot bend them past a certain point and so I wanted to try that this time.
Cue the next experiment: instead of using the Petite Fig doll pattern I called upon the techniques I use to create my Mannikin. Except that Mannikin is a wool sculpture over an entire body armature and this time I did not want to use an armature. Call me fickle.
If you are interested in doll armatures however, I am currently exploring this quite deeply with my friends over at Patreon, through the Doll Making Series.
Back to the grind: I wanted to see if I could do the whole thing with needle felting, anticipating of course that with the design I had in mind, the doll wouldn’t be able to stand.
So this time instead of stuffing/rolling the leg in three parts, I sculpted the leg in TWO parts. The foot, lower leg (including the knee) was all needlefelted into its shape, then the upper leg as a separate piece. Then they were all pushed into the leg pattern. There are no actual joints inside, other than I needle felted the parts to fit comfortably next to each other so that there would be no gaps.
With this technique you can see I can bend the little leg further back so my intention and the design that followed were a success!
Doll leg, explorations on movement.
I think this so called success is due to a few things: first of all, the needle felting technique. I am not stuffing, I am sculpting the entire thing into the shape (word of caution: the needle felting needs to be very firm and deeply felted, otherwise with time it will expand and lose its shape). Second, the fact that there is only one seam creating stress in the leg, so when you bend the leg further back, the front of the leg doesn’t have a seam and the knit fabric is then able to stretch quite a lot. Third, a strongly reinforced seam, that allows you to manipulate the doll without breaking the stitches
As I mentioned, this is the leg technique I use with Mannikin because when I create these dolls I anticipate a lot of bendy shenanigans and I only want one seam obstructing the movement, but keeping the whole thing put.
I am happy to report I have achieved at least some sort of decorum in the dollmaking world where I can now needle felt body parts to the same dimensions (don’t get me started…) and make a whole design in my head, and then have it at least come to life in a rather pleasing way, even if not exactly how I saw it in my head.
Very happy with the results but you can already tell, the movement explorations continue.

Doll leg design: achieving movement in wool sculpted dolls.
This doll has quite a few ‘articulations’ to speak to her name: first of all, the knee thing. She is in a permanently seated position due to sewn-fabric-joints at the top of the legs, but she makes up for it by also having arms that can be bent into position. Once I did the leg I had to try the arms of course!
I needle felted the hand and thumb, then I needle felted the lower arm and then the upper arm. Her arms are so shapely and cute, but I didn’t want to needlefelt an elbow because I thought it might stop the motion. I just left more slack in the fabric so the pieces inside can be manipulated in play.
She also sports the moveable head (which was my Exploration on Movement Part 2) of most of my Petite Figs nowadays. No wire or plastic joint in the head, just some clever socket articulation that allows the head to move to both sides, up, down and anywhere in between.

Explorations on Doll movement: creating a ‘joint’ at the knee without actual joints.

Doll design: explorations on movement by Fig and me.
She is quite small, about 12” tall, so I wanted to give her weight and added doll making glass beads to the torso. The way I did this made me giggle…it is such a shapely and pretty pouch! But that’s a secret between Miss Jonna and me. Do you too take pleasure in making the unseen parts of your doll as beautiful as you can?
Her body proportions correspond to an 8 year old so we are having fun creating a full wardrobe for her. Since I have never made a doll in this size and with this body design, I want her to go home with an attire that will keep her satisfied for quite some time.

Explorations on movement and doll design, by fig and me.
Would you look at those tiny feet? You have probably seen them on Instagram before I covered them in fabric. Well, I am happy to say she has now a lovely pair of lambswool boots, and both socks…though she took one off during the photo shoot (she was in a silly mood that day).
Jonna is of course a one-of-a-kind doll, and we have never properly introduced her so you will have to wait a little bit more for that.
For now I leave you with these:

Jonna, a wool sculpted natural fiber art doll by Fig and me.

Long locks for Miss Jonna, a natural fiber art doll by Fig and Me.

Jonna, one of a kind wool sculpted fiber art doll by Fig and Me.


