The topics on dollmaking are endless, but one everybody is interested on is achieving a pleasing, sturdy, less traumatic, doll neck-line. In this post I will discuss with you several ways in which you can achieve it. There is no one way, it really depends on your pattern, your doll's proportions (larger dolls require more stamina and stronger necks to support the weight of the head) and just a little bit of practice.
construction
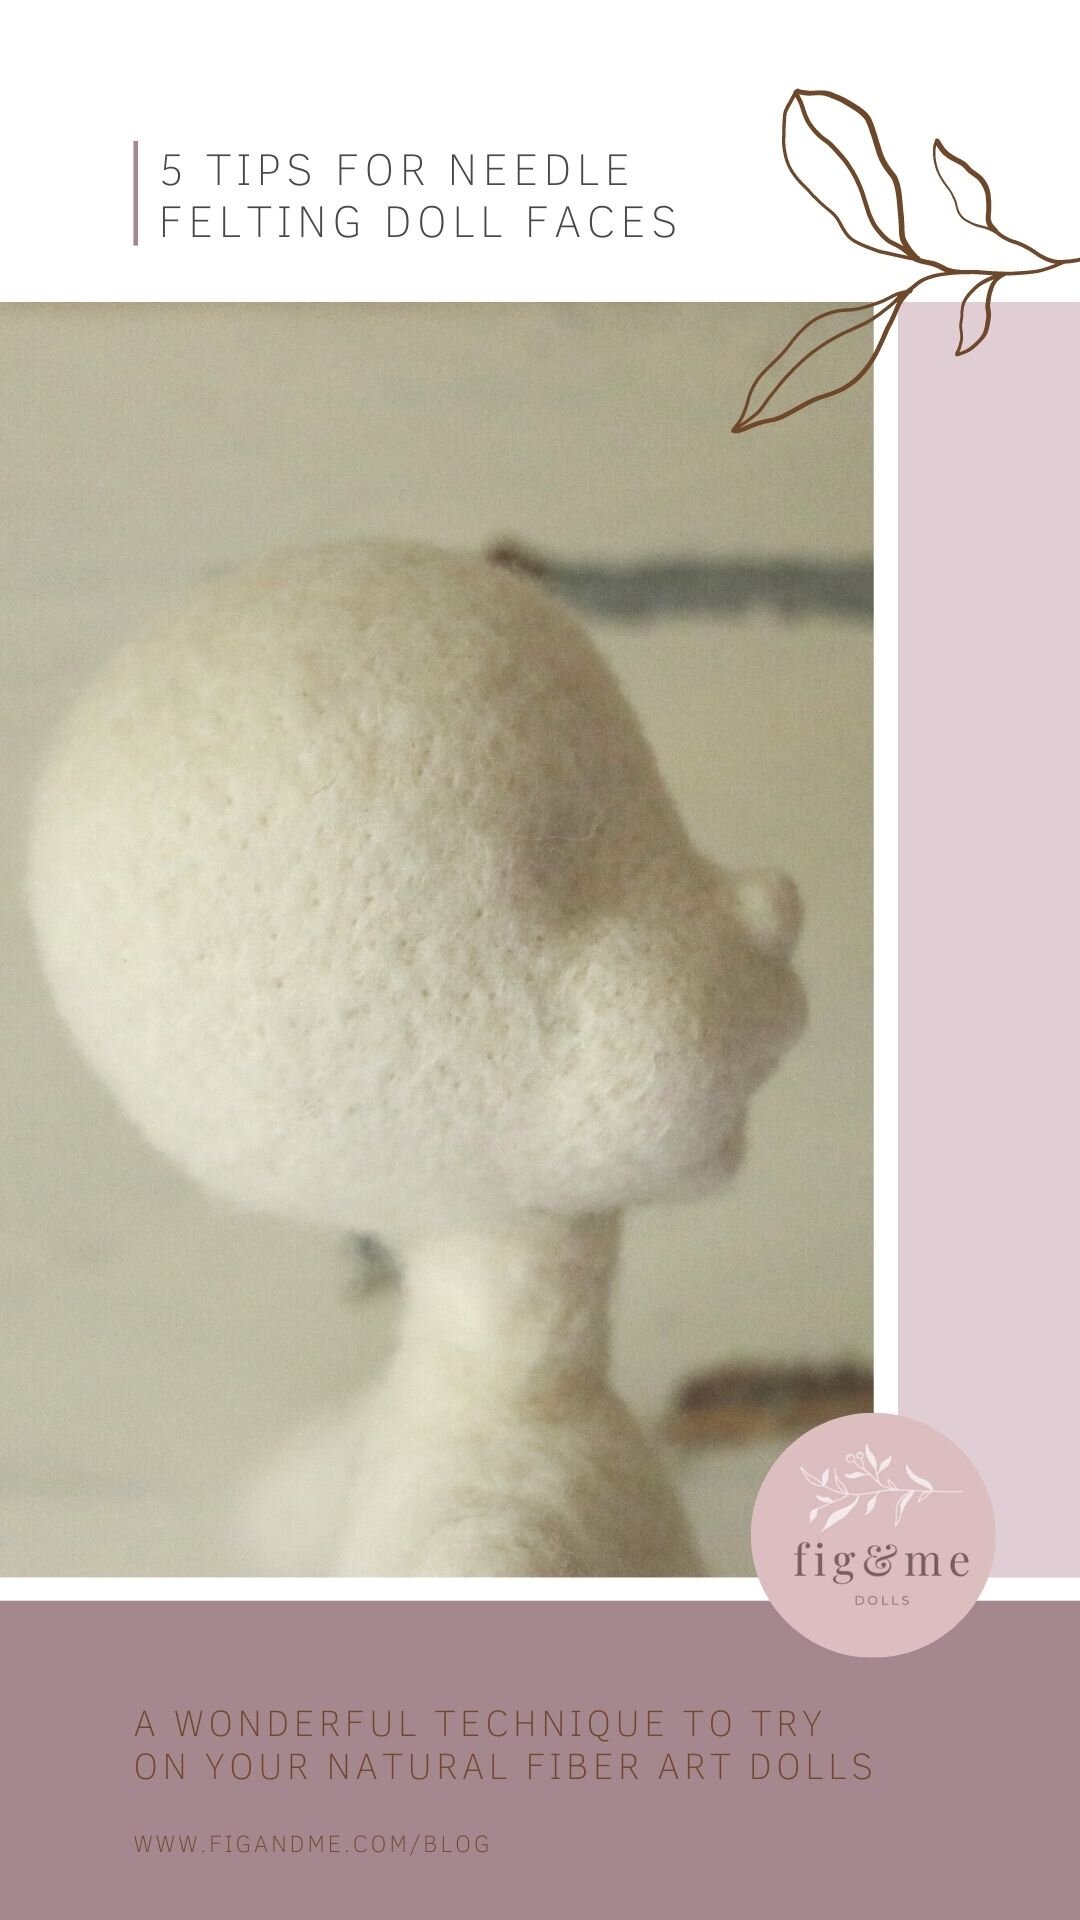
1. Head.
First, let's discuss the construction of your doll's head. Typically you will roll a a very tight ball of wool, cover it with a few strips in a star pattern and then cover it with a square of batting. The strips of wool give you a firmer neck, as you are putting more wool under the square, plus this last bit of wool (square) gives you nice fluffy wool to sculpt your doll's features, it smoothes out the face and adds to the neck. Once you tie this neck, you will have a long chunk of wool hanging under your head. This is traditionally called "the muff". I like to think of it as a spine, not a muff. You will then proceed to cover the whole thing with gauze/stockinette and tie the facial/head features.
2. Neck | spine of your doll.
If your doll pattern doesn't really have a neck, and you join the head straight to the torso/shoulders, it should still look like the first photo. If your doll pattern does have a streamlined neck, it becomes more important than ever to make such neck extremely sturdy and proportionate to your doll's head (too thin a neck and the head will wobble as the wool keeps compressing over time, the fabric will sag, not pretty!— too thick and your doll will look odd). There are two way to make this neck/spine very sturdy: one is to needle-felt it into a compressed mass by adding more strips of wool and compacting it with the needle; the other is to needle-sculpt it or to wrap strong cotton thread around it to firm out the wool spine and give it strength. Which ever way you do it is very important that this spine feels very firm and that it looks to you "healthy" in proportion to your doll's head.
3. Covering the head.
After you have sculpted (wether with needle-felting or with needle and thread) your doll's facial features you are then to cover it in a fabric that stretches over the whole head. I use two different kinds, swiss jersey by Laib Yala (which I feel is more suited when you want to sculpt, it bends more readily to the face) and dutch interlock by De Witte Engel (which is thinner and therefore gives sculpted faces a more gentle quality). The problem arises between having the lines of the fabric go straight over the centre of the face, and having loads of ripples at the neck, while having only one seam at the back. Your doll's head is obviously going to be much bigger than your spine so, you just need to play with the punches.
The way I do it is I only sew a piece that will cover the spine. I make sure I will have to stretch the fabric quite a bit to get the spine inside, and then I sew a little bit of a curve up the back of the head, just a little. You can do this much tighter by hand, but depending on the size of doll I do it with the sewing machine sometimes. I will then have quite a large piece of fabric at the top that will then be used to cover the face and the whole head and sew shut at both ends by hand. Doing it this way I make sure that where the head meets the spine/neck there is no extra amount of fabric to deal with and I am then able to achieve a pleasing finish with less trouble.
This photo illustrates what the back of the doll's head looks like. I always sew it twice to give it strength as well. As you can see from both photos, the fabric hugs the shape of my doll pretty accurately and this is before I tie it one more time at the neck, to make sure the fabric doesn't slip up or down when I am going to assemble the doll. I still sew the head to the neck fabric a few times: first with long stitches to put it in place, then I go over with small ladder stitch, and one last time with smaller stitches to smooth out any trouble. In the first round of sewing I make sure my needle grabs some of the doll's wool from the head so that it is sturdy, and the last two rounds are the finishing touch. Before I assemble the doll I give the head and spine several good shakes to see the wobble factor, and if I am satisfied with it, then I put the whole thing together.
I hope this post has given you some insight into how to construct and achieve a more tailored and strong neck for your doll. I received quite a few interesting questions in my last post so I will be sure to keep you posted. I hope everybody had a lovely weekend. I stayed out of online shenanigans, enjoyed lovely hours of doll making, a short lake trip with my family, a delicious supper cooked by my husband and a very messy house because it rained and everybody stayed in most of the day. I went to bed to the sounds and smells of rain outside my window, while our huge maple tree swayed. As I was falling asleep I thought to myself: life is not perfect, and there sure is much struggle, but there is so much beauty in it as well. Hope you see some of its beauty this week.